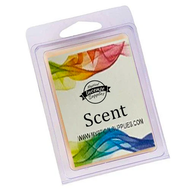
How to Make Wax Melts: A DIY Guide for Our Creative Friends
Posted by Diane Germann on Sep 19th 2024
Wax melts are a fantastic way to fill your home with fragrance without the flame of a traditional candle. They're fun to make, and with the right ingredients and a little creativity, you can craft your own personalized scents to enjoy or gift to others. Whether you're new to DIY or a seasoned crafter, this step-by-step guide will help you create high-quality wax melts in no time!
What You'll Need: Before we dive into the process, gather the following supplies:
1. **Wax**: The base for your melts. Popular choices include soy wax, beeswax, or paraffin wax. We recommend soy wax for its natural, eco-friendly properties and clean burn.
2. **Fragrance Oils**: Choose your favorite scents! Make sure you use oils specifically made for candles and wax melts to ensure a safe and pleasant experience.
3. **Dye (Optional)**: If you want your wax melts to have color, use liquid or block candle dyes. Avoid food coloring, as it doesn't blend well with wax.
4. **Molds**: Silicone molds work best as they’re flexible and make it easy to pop out the finished wax melts. You can use any shape, but small, manageable sizes are ideal.
5. **Double Boiler or Heat-Safe Container**: For melting your wax evenly and safely.
6. **Thermometer**: Monitoring temperature is key for the best results.
7. **Mixing Utensils**: A wooden or silicone spoon is great for stirring the melted wax and fragrance oil together.
Step-by-Step Guide to Making Wax Melts:
Step 1: Measure and Prepare Your Wax Start by measuring out your wax. The exact amount will depend on how many wax melts you want to make, but typically, 1 pound of wax will make approximately 15-20 small wax melts. If you're new to this, it’s better to start with a smaller batch.
Step 2: Melt the Wax Use a double boiler to melt the wax. If you don’t have one, you can create one by placing a heat-safe container (like a glass bowl) over a pot of boiling water. Stir the wax frequently as it melts to avoid any clumping. Make sure to keep an eye on the temperature—wax should be melted slowly, ideally between **170°F - 180°F (76°C - 82°C)** depending on the type of wax you're using. Use a thermometer to monitor the temperature.
Step 3: Add Fragrance Oils Once your wax is fully melted, remove it from the heat and allow it to cool slightly (to around **160°F - 170°F** for most waxes). This is the perfect temperature to add your fragrance oil. For a strong scent, use about **1 ounce of fragrance oil per pound of wax**—but feel free to adjust based on how strong you want the scent to be. Stir the fragrance oil in for about **2 minutes** to ensure it is evenly distributed throughout the wax.
Step 4: Add Dye (Optional) If you want to add color to your wax melts, now is the time! Add a small amount of dye and stir thoroughly. Remember, a little goes a long way, so start with a small amount and adjust until you reach your desired shade. If you're making multiple colors, divide the wax into separate containers before adding the dye.
Step 5: Pour the Wax Into Molds Once your wax is mixed with fragrance and dye, carefully pour it into your silicone molds. Make sure to pour slowly and evenly to avoid air bubbles. If needed, use a spoon or spatula to smooth out the surface. Allow the wax to cool and harden. This can take anywhere from **1 to 4 hours**, depending on the size of your molds and the room temperature. Once hardened, gently pop the wax melts out of the molds.
Step 6: Cure Your Wax Melts For the best scent throw, it's essential to let your wax melts cure for at least **24-48 hours**. Some waxes, like soy, benefit from even longer curing times (up to 2 weeks). Store them in a cool, dry place during the curing process.
Step 7: Enjoy! Once cured, your wax melts are ready to use! Simply place one in a wax warmer, sit back, and enjoy the lovely fragrance filling your space.
Tips and Tricks for Perfect Wax Melts:
- **Experiment with Scents**: Get creative! Try blending different fragrance oils to create your own signature scent.
- **Temperature Control**: Keeping an eye on the temperature is crucial to ensure your wax melts turn out perfectly. Adding fragrance oil or dye at the wrong temperature can lead to weak scent throws or discoloration.
- **Storage**: Store your wax melts in an airtight container or bag to preserve their fragrance. Keep them in a cool, dark place to prevent the scent from fading over time.
Final Thoughts Making wax melts is a fun, rewarding DIY project that lets you express your creativity through scent and color. Plus, it’s a great way to ensure you’re using natural ingredients that align with your preferences. Whether you’re crafting for yourself, making gifts for friends, or starting your own small business, these steps will guide you through the process. Have fun making your own wax melts, and remember—there’s no limit to the combinations of scents and colors you can explore! If you’re looking for high-quality supplies, call us at Signs and Novelties Pack-N-Ship, LLC and we will help you with finding a supplier near you.
Happy crafting!

